Welcome to Your Website!
Your site is built using Divi- a state-of-the-art builder. You can find tutorials on items specifically used to build your site here.
The Divi Builder is easy to use but might require some practice. KMDD is always available for edits. Contact Karen for the latest KMDD Maintenance Fee Schedule.
Before attempting any major edits, perform a backup of your site using Updraft link at the top of your screen. Siteground hosting keeps daily backups of you site as well.
Divi Builder Basics
A Word About WordPress and Divi
Your site is built with WordPress.
It is created using the Divi Theme.
WordPress.org is free open source software. It is also the platform of choice for over 39% of all sites across the web. https://wordpress.org/about/
Do not confuse it with WordPress.COM which is a hosting platform for WordPress. If you're interested, read more about that here: https://www.wpbeginner.com/beginners-guide/self-hosted-wordpress-org-vs-free-wordpress-com-infograph/
Divi is a WordPress page builder made by Elegant Themes and the (self proclaimed) most popular WordPress theme In the world. It is the "bones" that your website is built upon. KMDD has been using WordPress exclusively since 2008 and Divi exclusively since 2014.
In December 2018 WordPress launched a major update of its software and became a page builder with some similarities to Divi but not nearly the power or options. Because your site is built with Divi, and the classic WordPress editor is much easier to use, your site has the WordPress Gutenberg Builder disabled.
If you search WordPress.org documentation you may find differences in how your backend works since current documentation is geared towards the latest version of the Gutenberg builder. If you feel that you would like to use this new builder, please send a request to KMDD and we will enable the new builder.
Posting Forbes Articles to the Practical Insights Blog (Divi Builder not used)
Practical Insights are POSTS created for your blog.
This tutorial is for adding Forbes Articles originally posted on Forbes.com
There are currently two blog categories: Forbes Articles and Practical Insights (anything that is NOT a Forbes Article).
To add a Forbes Article first visit the original article on forbes.com. Copy the URL to memory.
Login to your site (if you're reading this, you're already logged in). In the Dashboard visit Posts>Add New. There is also a shortcut at the top of your backend in the black bar under "New". Make sure you are creating a new POST, not Page or Project.
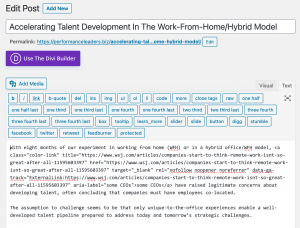
Add a Title for your article
DO NOT CLICK The purple Divi Builder button. We will not use that for these posts.
The WordPress Editor to create your post is directly below the title. Before you create your post scroll down below the Editor to the "Forbes Link to Original Post" and paste the URL you copied into that dialog box.

Save Draft at any time during your composing process, or to continue at a later date, in the Publish box (right sidebar).
Create your post text
Scroll back up to the Editor. Copy your post content from your original word document, or if needed, from the Forbes online article. Paste into the Text tab (upper right). If you paste into the Visual Tab you risk bringing in unwanted style code with your text. You will not be using the Divi Builder, so ignore that big purple button.
After you paste your article into the Text tab, click back into the Visual Tab and adjust any line spaces, or text formatting. The WP-Editor has a small menu of tools similar to any text editor, bold, italic, lists, etc. There is a text formatting dropdown menu for built in styles in the far left tool menu. Most text will be formatted as "paragraph". Never use the Heading 1 (H1) for any titles or subtitles within your article. This is reserved for the article title for SEO best practice. To use a header format for a subtitle on the page, title text needs to be on it's own line. Use Header 2 and Header 3 for best practice.
Choose the category (right sidebar)- Forbes Articles.

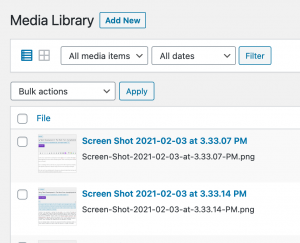
Add a Featured Image.

To add media to your site either visit Dashboard>Media and click Add New. Upload your images, or you can do this directly from the Add Featured Image area.
Where to get images
Visit 123rf.com for a repository of inexpensive stock images. $47 buys 40 credits. For blog post featured images small sized images are only 2 credits (download Size Small). If you are using an image downloaded from 123RF there is no need to worry about the image size or formatting. If you are using an image from another source be sure that your image is 849px wide, 565px high at 72dpi. Images should be RGB jpg.
Save Draft and click Preview Changes to review your post. If you are satisfied with your post, close the preview window.
Publish your post. You can even set a date to publish in the future- add your date in the Publish on area.
Creating a Practical Insights Blog Post (Divi Builder not used)
Practical Insights are POSTS created for your blog.
This tutorial is for adding any post that is NOT a Forbes Article
There are currently two blog categories: Forbes Articles and Practical Insights (anything that is NOT a Forbes Article).
Login to your site (if you're reading this, you're already logged in). In the Dashboard visit Posts>Add New. There is also a shortcut at the top of your backend in the black bar under "New". Make sure you are creating a new POST, not Page or Project.
Add a Title for your article
Save Draft at any time during your composing process, or if continuing at a later date, in the Publish box (right sidebar).
Create your post text
Scroll back up to the Editor. Copy your post content from your original word document, or if needed, from the Forbes online article. Paste into the Text tab (upper right). If you paste into the Visual Tab you risk bringing in unwanted style code with your text. You will not be using the Divi Builder, so ignore that big purple button.
After you paste your article into the Text tab, click back into the Visual Tab and adjust any line spaces, or text formatting. The WP-Editor has a small menu of tools similar to any text editor, bold, italic, lists, etc. There is a text formatting dropdown menu for built in styles in the far left tool menu. Most text will be formatted as "paragraph". Never use the Heading 1 (H1) for any titles or subtitles within your article. This is reserved for the article title for SEO best practice. To use a header format for a subtitle on the page, title text needs to be on it's own line. Use Header 2 and Header 3 for best practice.
Choose the category (right sidebar)- Practical Insights.
Add a Featured Image.
Visit 123rf.com for a repository of inexpensive stock images. $47 buys 40 credits. Images for blog post featured images are only 2 credits (download Size Small). If you are using an image downloaded from 123RF there is no need to worry about the image size. If you are using an image from another source be sure that your image is 849px wide, 565px high at 72dpi. Images should be RGB jpg.
Save Draft and click Preview Changes to review your post. If you are satisfied with your post, close the preview window.
Publish your post. You can even set a date to publish in the future- add you date in the Publish on area.
Creating lists
Creating indented numbered lists for your blog.
- Your numbered (ordered) lists have been now formatted to always show the numbers outside the list, with indented copy.
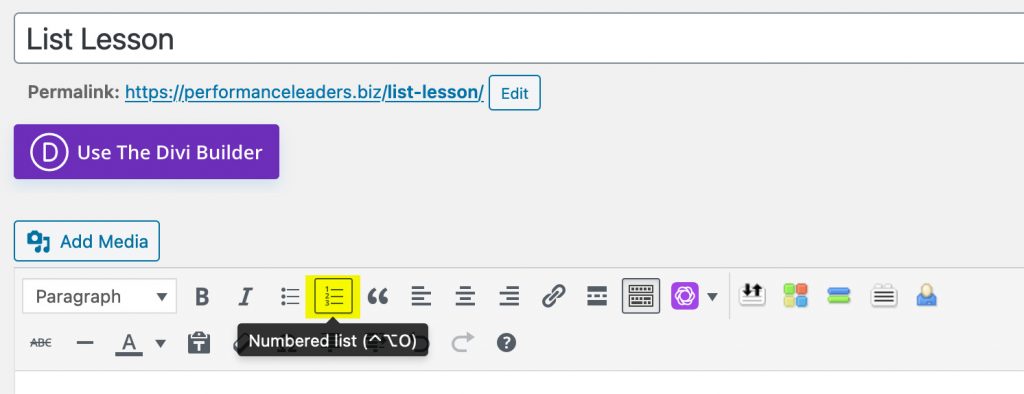
- To create a numbered list paste copy from your word editing software without the numbers.
- Select the list text and choose the Numbered List icon in the menu.
- Numbers will be created after any hard return in the list.
- To create new numbers in pasted text, place cursor at the start of the new list item and delete or backspace until it appears just after the previous item.
- Click return to add the new number.
- To create paragraphs within a list without creating a new number, add a return in the Text Tab (upper right). Click back to the Visual tab to continue the list.
- To END the list and continue with post content, hit double return.
- To create Bold titles use the B (Bold) icon in the menu.
Here is what an Ordered list looks like in HTML (in the text tab)
<ol>
<li>list item</li>
<li>list item</li>
<li>list item</li>
</ol>
Note that ending tags have a slash / before them